Introduction to Wire Wrapped Pendants
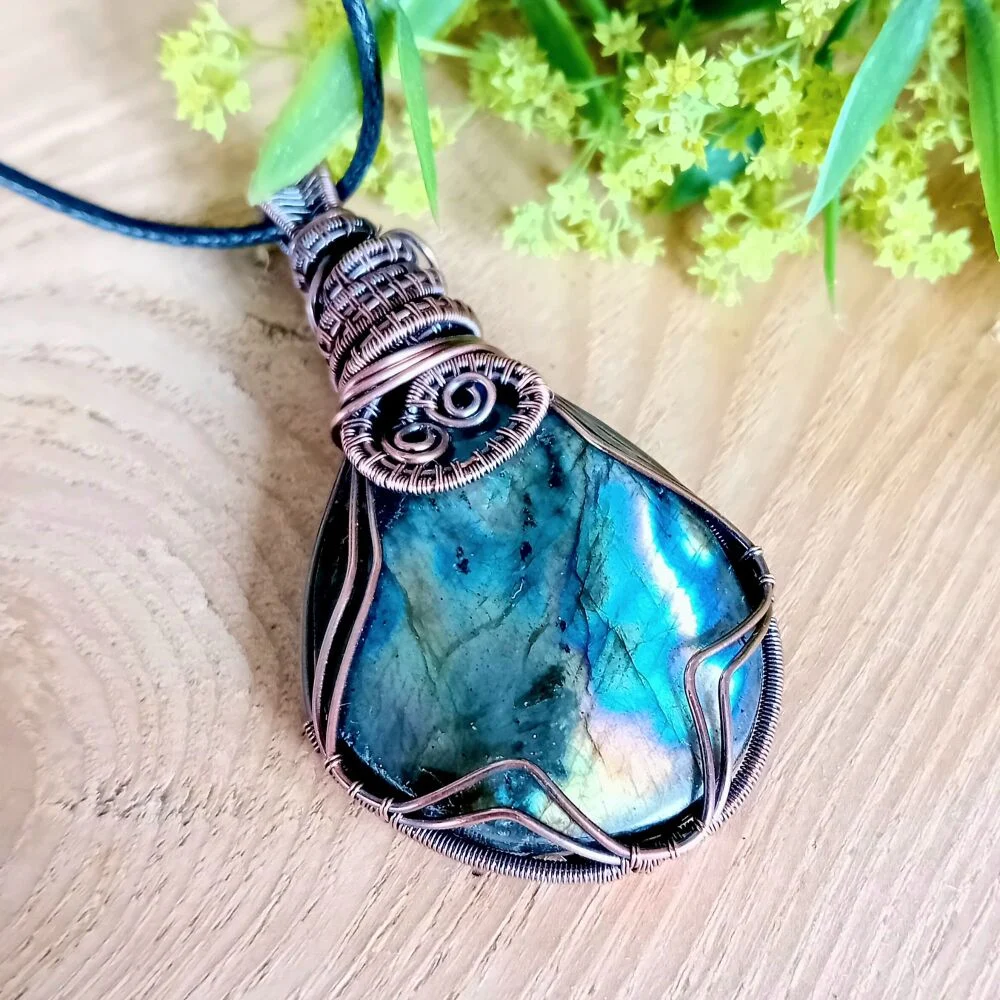
Wire wrapped pendant combines artistry and skill. It features wires skillfully twisted and turned around a central stone or bead. This technique creates unique and intricate jewelry pieces. Wire wrapped pendants offer endless design possibilities. They can range from simple twists and loops to complex abstract forms. Both hobbyists and professional jewelers enjoy making these pendants. They appreciate the freedom and creativity wire wrapping allows. With just a few basic tools and materials, anyone can start crafting their own beautiful pendants.
Wire wrapping does not require soldering or other heat-based techniques. This makes it accessible to beginners. With practice, wire wrappers learn to manipulate the wire. They achieve tension, structure, and beauty all at once. A well-crafted wire wrapped pendant can be a true work of art, reflecting the maker’s style and skill.
Enthusiasts of wire wrapped jewelry value the uniqueness of each piece. Crafters can personalize pendants with different stones, wire types, and wrapping styles. This art form is perfect for those who love to create personalized, handcrafted items. Whether for personal wear or as thoughtful gifts, wire wrapped pendants hold special meaning.
Essential Tools and Materials for Wire Wrapping
To begin wire wrapping, you need the right tools and materials. Without these, creating a wire wrapped pendant can be challenging. Quality tools make the process smoother and your end product more professional.
Tools Needed for Wire Wrapping
Start with these basic tools:
- Round nose pliers: They help you create loops and curves in the wire.
- Flat nose pliers: For holding wire and making sharp bends.
- Wire cutters: Essential for cutting wires to the desired length.
- Needle files: Smooth out any sharp ends or rough spots on your piece.
- Jeweler’s hammer: Used for flattening and strengthening the wire.
- Mandrel or a dowel rod: Helps form consistent loops or curves.
- Tape measure: Accurate measurement ensures that wire lengths are correct.
Materials for Wire Wrapping
Choose quality materials for the best results:
- Craft wire: Comes in various gauges. Higher gauges mean thinner wire which is good for intricate designs.
- Base metal wire: For practice before using more expensive materials.
- Sterling silver or gold-filled wire: Ideal for high-end wire wrapped pendants.
- Gemstones, beads, or cabochons: The focal point of your pendant.
- Polishing cloth: For cleaning and shining your finished pendant.
The right tools and materials will elevate your wire wrapped pendant from a craft to a piece of jewelry that stands out. Invest in these essentials, and you’ll have a solid foundation for mastering wire wrapping techniques.
Basic Wire Wrapping Techniques
To craft a stunning wire wrapped pendant, you’ll need to master some basic techniques. These foundational methods are building blocks for more complex designs and ensure your pendant is both aesthetic and durable. Let’s explore these essential skills:
- Securing the Stone: Begin by securely anchoring your chosen stone, bead, or cabochon with the wire. This involves wrapping wire around the stone’s base or through a hole if available.
- Making Loops: Use round nose pliers to create loops. This will add decorative elements and serve as connections for other parts of the pendant.
- Twisting Wire: By tightly twisting strands together, you enhance the strength and visual appeal of your piece.
- Bending Wire: Use flat nose pliers to make precise bends, shaping the wire to complement the form of the stone.
- Wrapping Techniques: There are various wrapping methods, such as coiling or herringbone wraps, to encase the stone and add intricate detailing.
As you practice these basics, keep the wire tension consistent to avoid kinks or weak spots. Also, ensure all wire ends are trimmed and filed for a professional finish. Remember, the key to beautiful wire wrapped pendants lies in patience and steady practice with these techniques.
Designing Your Own Wire Wrapped Pendants
Designing your own wire wrapped pendants is an exciting way to express creativity. Start by choosing a gemstone, bead, or cabochon that speaks to you. The shape, color, and size of your focal point will guide the design process.
- Select Your Stone or Bead: Consider the properties of the stone. Is it hard or soft? Will it be drilled or undrilled? Your choice directs how you’ll secure the stone in wire.
- Sketch Your Design: Before you start, sketch your ideas. This helps visualize the final piece and plan wire lengths and shapes.
- Choose Your Wire: Based on your design, select the right gauge and type. Remember, intricate designs need thinner wire.
- Decide on a Style: Will you aim for elegance or a more rustic look? Your style will influence the way you twist and bend the wire.
- Consider Embellishments: Think about adding smaller beads or using different wire colors for extra flair.
Once you have these decisions made, you’re ready to bring your design to life. Use the techniques you’ve learned and let your creativity shine. As you work, adapt the design when needed. Sometimes the wire or stone suggests changes as you go. Trust your instincts and enjoy the process. Your unique wire wrapped pendant will soon emerge, a testament to your design concept and wire wrapping skills.
Step-by-Step Guide to Creating a Wire Wrapped Pendant
Creating a stunning wire wrapped pendant involves patience and precision. Follow these simplified steps to begin your next jewelry project with confidence:
- Gather Supplies: Based on your design, collect all necessary tools and materials. Have your pliers, wire cutters, needle files, wire, and selected stone ready.
- Prepare the Wire: Cut a length of wire. Use your tape measure for accuracy. If needed, straighten the wire using your hands or nylon jaw pliers.
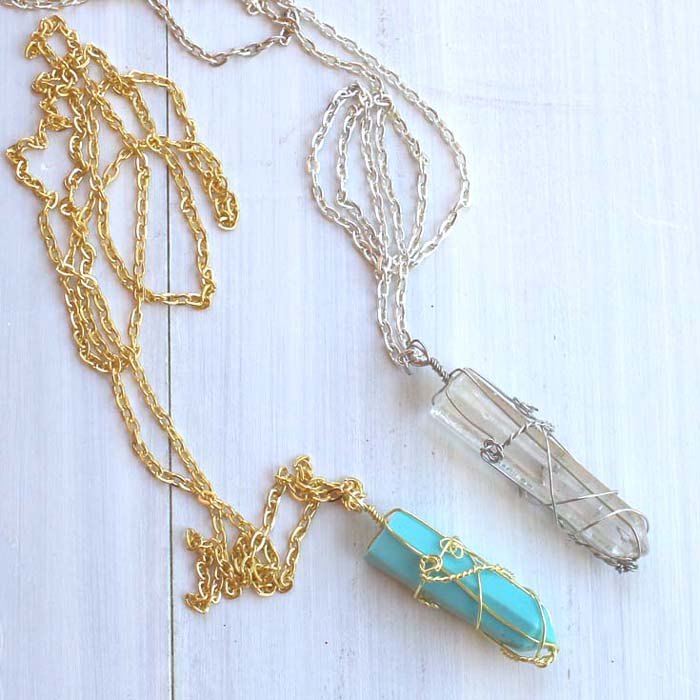
- Secure the Stone: Position your stone or bead at the wire’s center. Wrap the wire around it to hold it in place. The stone should not move when tugged gently.
- Create the Bail: Use round nose pliers to bend the wire above the stone into a loop. This forms the bail for your pendant to hang from a chain or cord.
- Wrap and Decorate: Start wrapping the wire around the stone. Add loops, twists, or coils to add intricate details. Refer to the basic techniques you’ve learned to guide your creativity.
- Trim Excess Wire: Once happy with your design, cut off any extra wire. Be sure to leave enough wire to tuck in the ends securely.
- Finish the Ends: Use needle files to smooth any sharp edges. Tucked ends should be tight against the pendant to prevent snagging.
- Polish and Clean: Use a polishing cloth to shine your pendant. This will also remove fingerprints and minor marks from handling.
By following these steps, you’ll craft a personalized wire wrapped pendant. Ensure to weave the keywords naturally into your instructions. As you practice, you’ll develop your unique style and become more efficient with each piece you create.
Tips for Polishing and Finishing Wire Wrapped Jewelry
Creating a wire wrapped pendant is just the start. The final look often depends on how well you polish and finish it. Here are some tips to make sure your wire wrapped jewelry shines.
- Polish Regularly: Your jewelry might tarnish over time. Use a polishing cloth to keep it bright. Rub gently on the wire and the stone.
- Smooth the Ends: Avoid snags on clothing. Ensure all wire ends are well-tucked and smooth.
- Check for Looseness: Make sure all wires are secure. This will help your pendant hold its shape.
- Use Patina for Aging: For an antique look, apply patina. Then, polish to highlight raised areas.
- Avoid Chemical Cleaners: Harsh chemicals can damage the wire. Stick to mild soaps and water for cleaning.
- Final Inspection: Look over your piece for any missed spots. Make sure it meets your standards.
Remember, the effort you put into polishing and finishing can elevate your wire wrapped pendant. With these tips, you’ll give your jewelry a professional touch.
Advanced Wire Wrapping Styles and Techniques
After mastering the basics, it’s time to explore advanced wire wrapping styles and techniques. These skills will add complexity and flair to your wire wrapped pendants. Let’s delve into some sophisticated methods:
Weaving and Braiding Wire
Weaving wire creates detailed patterns. Layer thin wires over each other. Use two or more strands and braid them for a textured look. Weaving and braiding require steady hands and patience.
Using a Viking Knit
Viking knit is an ancient technique. It involves looping wire into a tubular shape. It looks like a knit fabric made of wire. This style adds a unique twist to your pendants.
Sculptural Wire Wrapping
Take your creativity to three dimensions. Bend and twist the wire to form shapes like flowers or leaves. Sculptural wrapping turns your pendant into a miniature wire sculpture.
Incorporating Chain Maille
Chain maille involves linking loops of wire together. Combine it with wrapping to create intricate designs. Start with simple patterns before moving to complex ones.
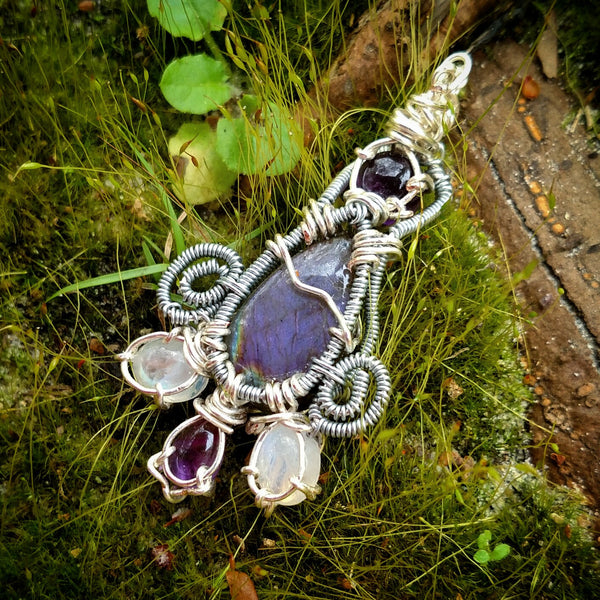
Working with Multiple Stones
Use several stones in one pendant for added impact. Build a frame to hold them all. Balance the design so the pendant hangs well when worn.
As you progress, experiment with these advanced techniques. Stay patient and keep practicing. These skills will elevate your wire wrapped pendants to new heights of beauty and intricacy. Remember, the essence of a wire wrapped pendant lies in its elaborate craftsmanship and personalized touch.
Troubleshooting Common Wire Wrapping Challenges
When creating wire wrapped pendants, you may face a few challenges. It is part of the learning process. Here are some common issues and how to fix them:
- Loose Stones: If your stone feels wobbly, the wire isn’t tight enough. Adjust the tension by gently pulling the wire until the stone is secure.
- Uneven Loops: This can happen if you don’t use the same spot on your round nose pliers every time. Make a mark on your pliers to guide you.
- Wire Snapping: Using too much force or bending the wire back and forth can cause it to break. Work slowly, and avoid sharp bends. If the wire breaks, start with a fresh piece.
- Tangled Wire: Wire can become knotted if not handled carefully. Keep your working area clear and avoid overhandling the wire.
- Marks on Wire: Tools can leave unwanted marks. Use nylon jaw pliers or place a cloth between the wire and metal pliers.
- Kinks in Wire: Straighten out kinks by running the wire through nylon jaw pliers. If a kink is severe, it’s best to use a new piece of wire.
- Difficulty in Handling Thin Wire: Thinner wires are hard to control. Practice with thicker gauges, then move to thinner ones as you gain control.
By addressing these challenges, your wire wrapped pendant making will improve. Keep trying, and don’t hesitate to undo and redo parts as needed. With each piece, your skill in crafting wire wrapped jewelry will grow.
Tags: beautiful pendants, creativity shine, style and skill, wire wrapped pendant